The paragraphs below tell a bit about the turn and bank indicator regulator bellows and describe the refurbish process. You can also check out our video below.
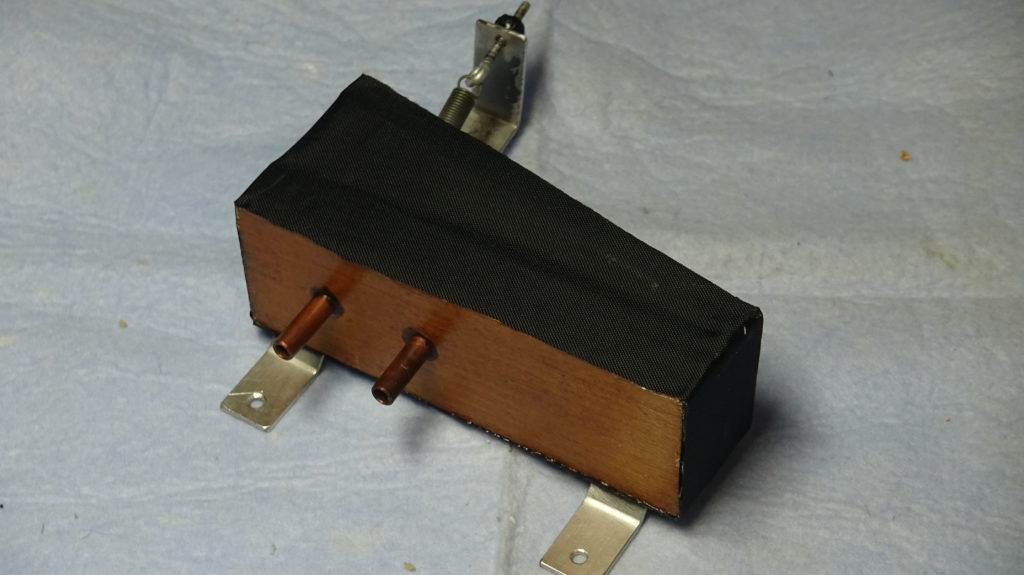
Vacuum is supplied to the turn and bank regulator bellows causing them to close against an opposing spring. A wooden pin inside the bellows is driven closer to a leather seat restricting vacuum flow out of the regulator bellows. The regulated output vacuum is adjusted by changing the tension on the bellows’ spring. This vacuum is supplied to a gyro inside the turn section of the turn and bank indicator.
The bellows are approximately 1.75” x 5”. The total bellows height is a little over 2 1/8”.
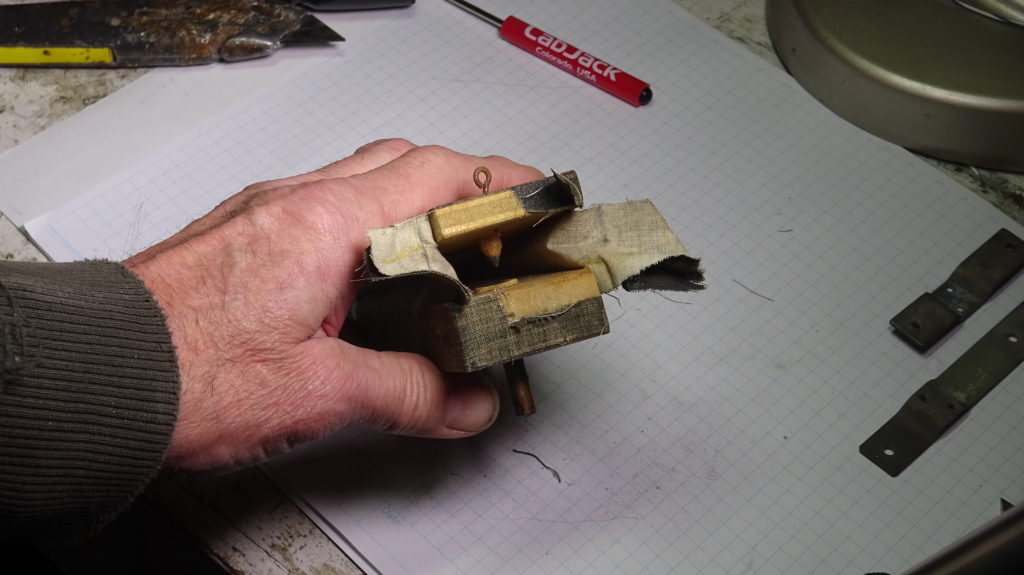
We start by removing the metal brackets, then force the old bellows wide open to measure the outer bellows height. We then slit the pneumatic material and measure the inside bellows gap.
A gapper tool can be made by cutting two thin pieces of wood based on these dimensions and gluing them together.
The old pneumatic material can then be torn off.
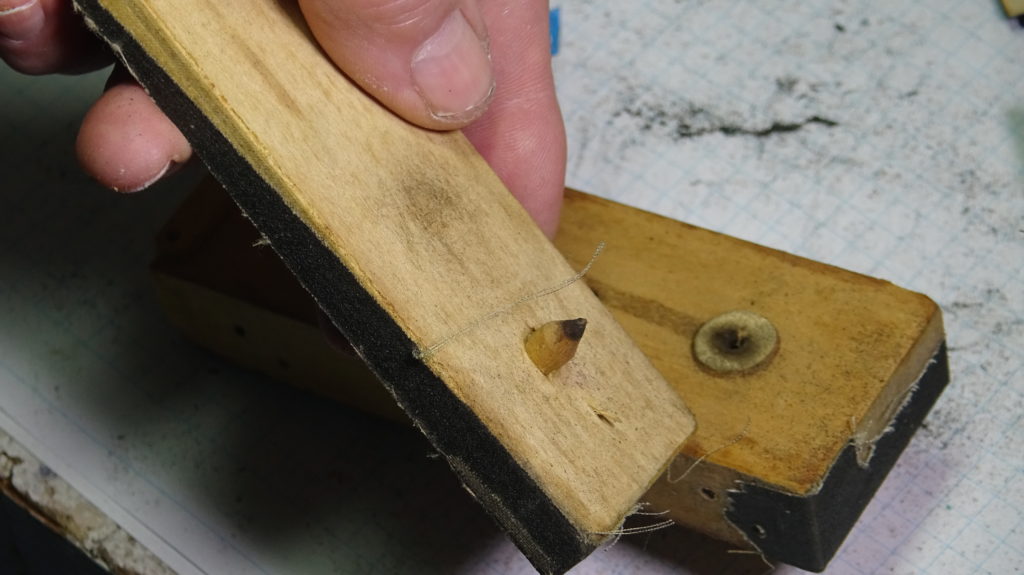
A light sanding on the edges removes remaining glue. We use Formby’s Furniture Refinisher to clean and remove old finish on the top and bottom, then finish with a light coat of varnish.
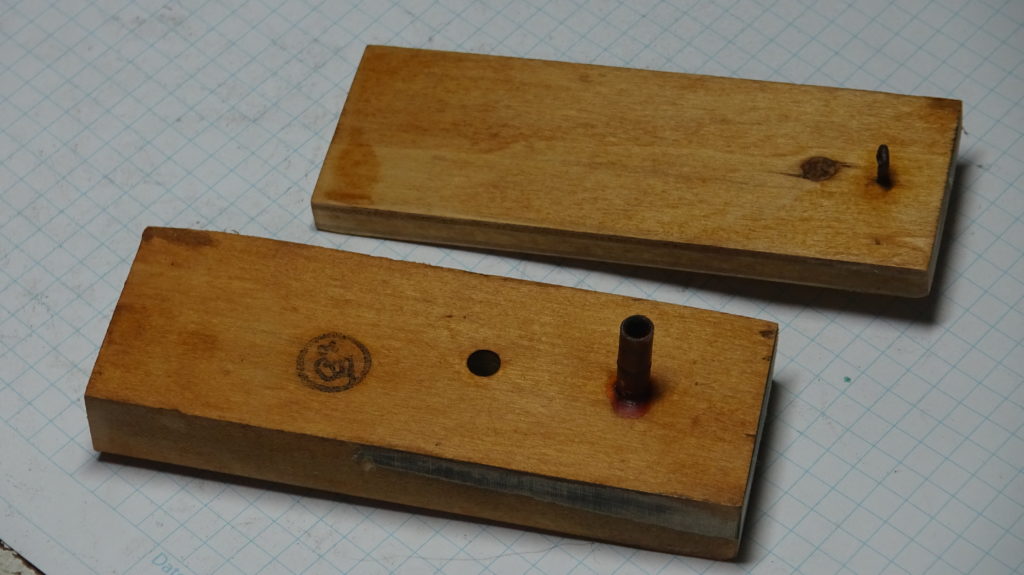
Metal parts can be cleaned by dipping them in a bath of carburetor cleaner for an hour, followed by a light scrubbing with steel wool, a bath in warm sudsy water, and a rinse.
A drop of light oil renews the adjustment screw and minimizes spring rust.
Spring Specification:
- Extension spring; 16 turns; 0.034″ diameter spring steel; 0.279″ diameter OD.
If the seat is in reasonable condition, it can be treated with a couple light coats of Obenauf’s Leather Preservative spread over a day; or, the seat can be replaced with a ½” diameter piece of leather with a 1/16” diameter hole.
The bellows cloth is cut about 15 ¾” x 2 ½” which allows for an overlap at the hinge plus an extra ½” in both directions. We use heavy pneumatic material by D. C. Ramey Piano Co. It can be ripped along the long direction and cut with scissors at the ends.
We cut two pieces of pillow ticking 1 ¾” x 1-9/32” to make the hinges.
Once all the individual parts are ready, the bellows are recovered with new hinges and pneumatic cloth.
We start by gluing the first hinge layer onto the bellows with PVC-E glue or D. C. Ramey Piano Co.’s P-N-E-U (new) glue. It is important that this hinge aligns so that the pin mates with the hole in the leather seat. A rubber band can be applied to assure proper hinge alignment. The glue can be set with a warm iron. We let the glue dry completely to ensure that the hinge stays in alignment.
Pneumatic cloth is glued, shiny side in, starting with the hinge side.
The gapper tool holds the bellows open as the first side is glued. It is important to use a continuous bead of glue on the bellows edges and at corners to avoid vacuum leaks. Each glued side is rubbed against a warm iron to set the glue and to eliminate any wrinkles in the pneumatic cloth. A second hinge layer of pillow ticking is applied prior to gluing the last layer of overlapping pneumatic material over the hinge. We noted that not all turn and bank indicator regulator bellows use the second layer of hinge material. Some only have the first layer.
After all sides have been glued and set, the excess pneumatic cloth is trimmed off.
The next step is to set the cloth material creases; first sides, then back. We add a rubber band.
Bracket holes can be located with a pork stick. Holes can be opened and sealed in the pneumatic cloth with a soldering iron. The brackets are then reinstalled with screws.
The bellows is ready for installation into the Blue Box.